

Blog / Gower Ford Service

Blog

All Gower Ford Service Dennis Sneed Ford Gower Ford Dealer Ford Trucks Ford SUVs Ford F-150 Ford Super Duty Ford Super Duty Trucks Ford Bronco Ford Explorer Ford Maverick Ford Bronco Sport chevy silverado Dennis Sneed Ford Service Used Ford Trucks 2025 Ford Bronco Sport Big Bend 2025 Ford Bronco Sport Outer Banks Battery Maintenance EV Trucks Ford EV Ford Fathom Gower Used Cars How Long Does a Car Battery Last How To Change Your Oil
Car Battery Service at Dennis Sneed Ford

How Long Does a Car Battery Last?

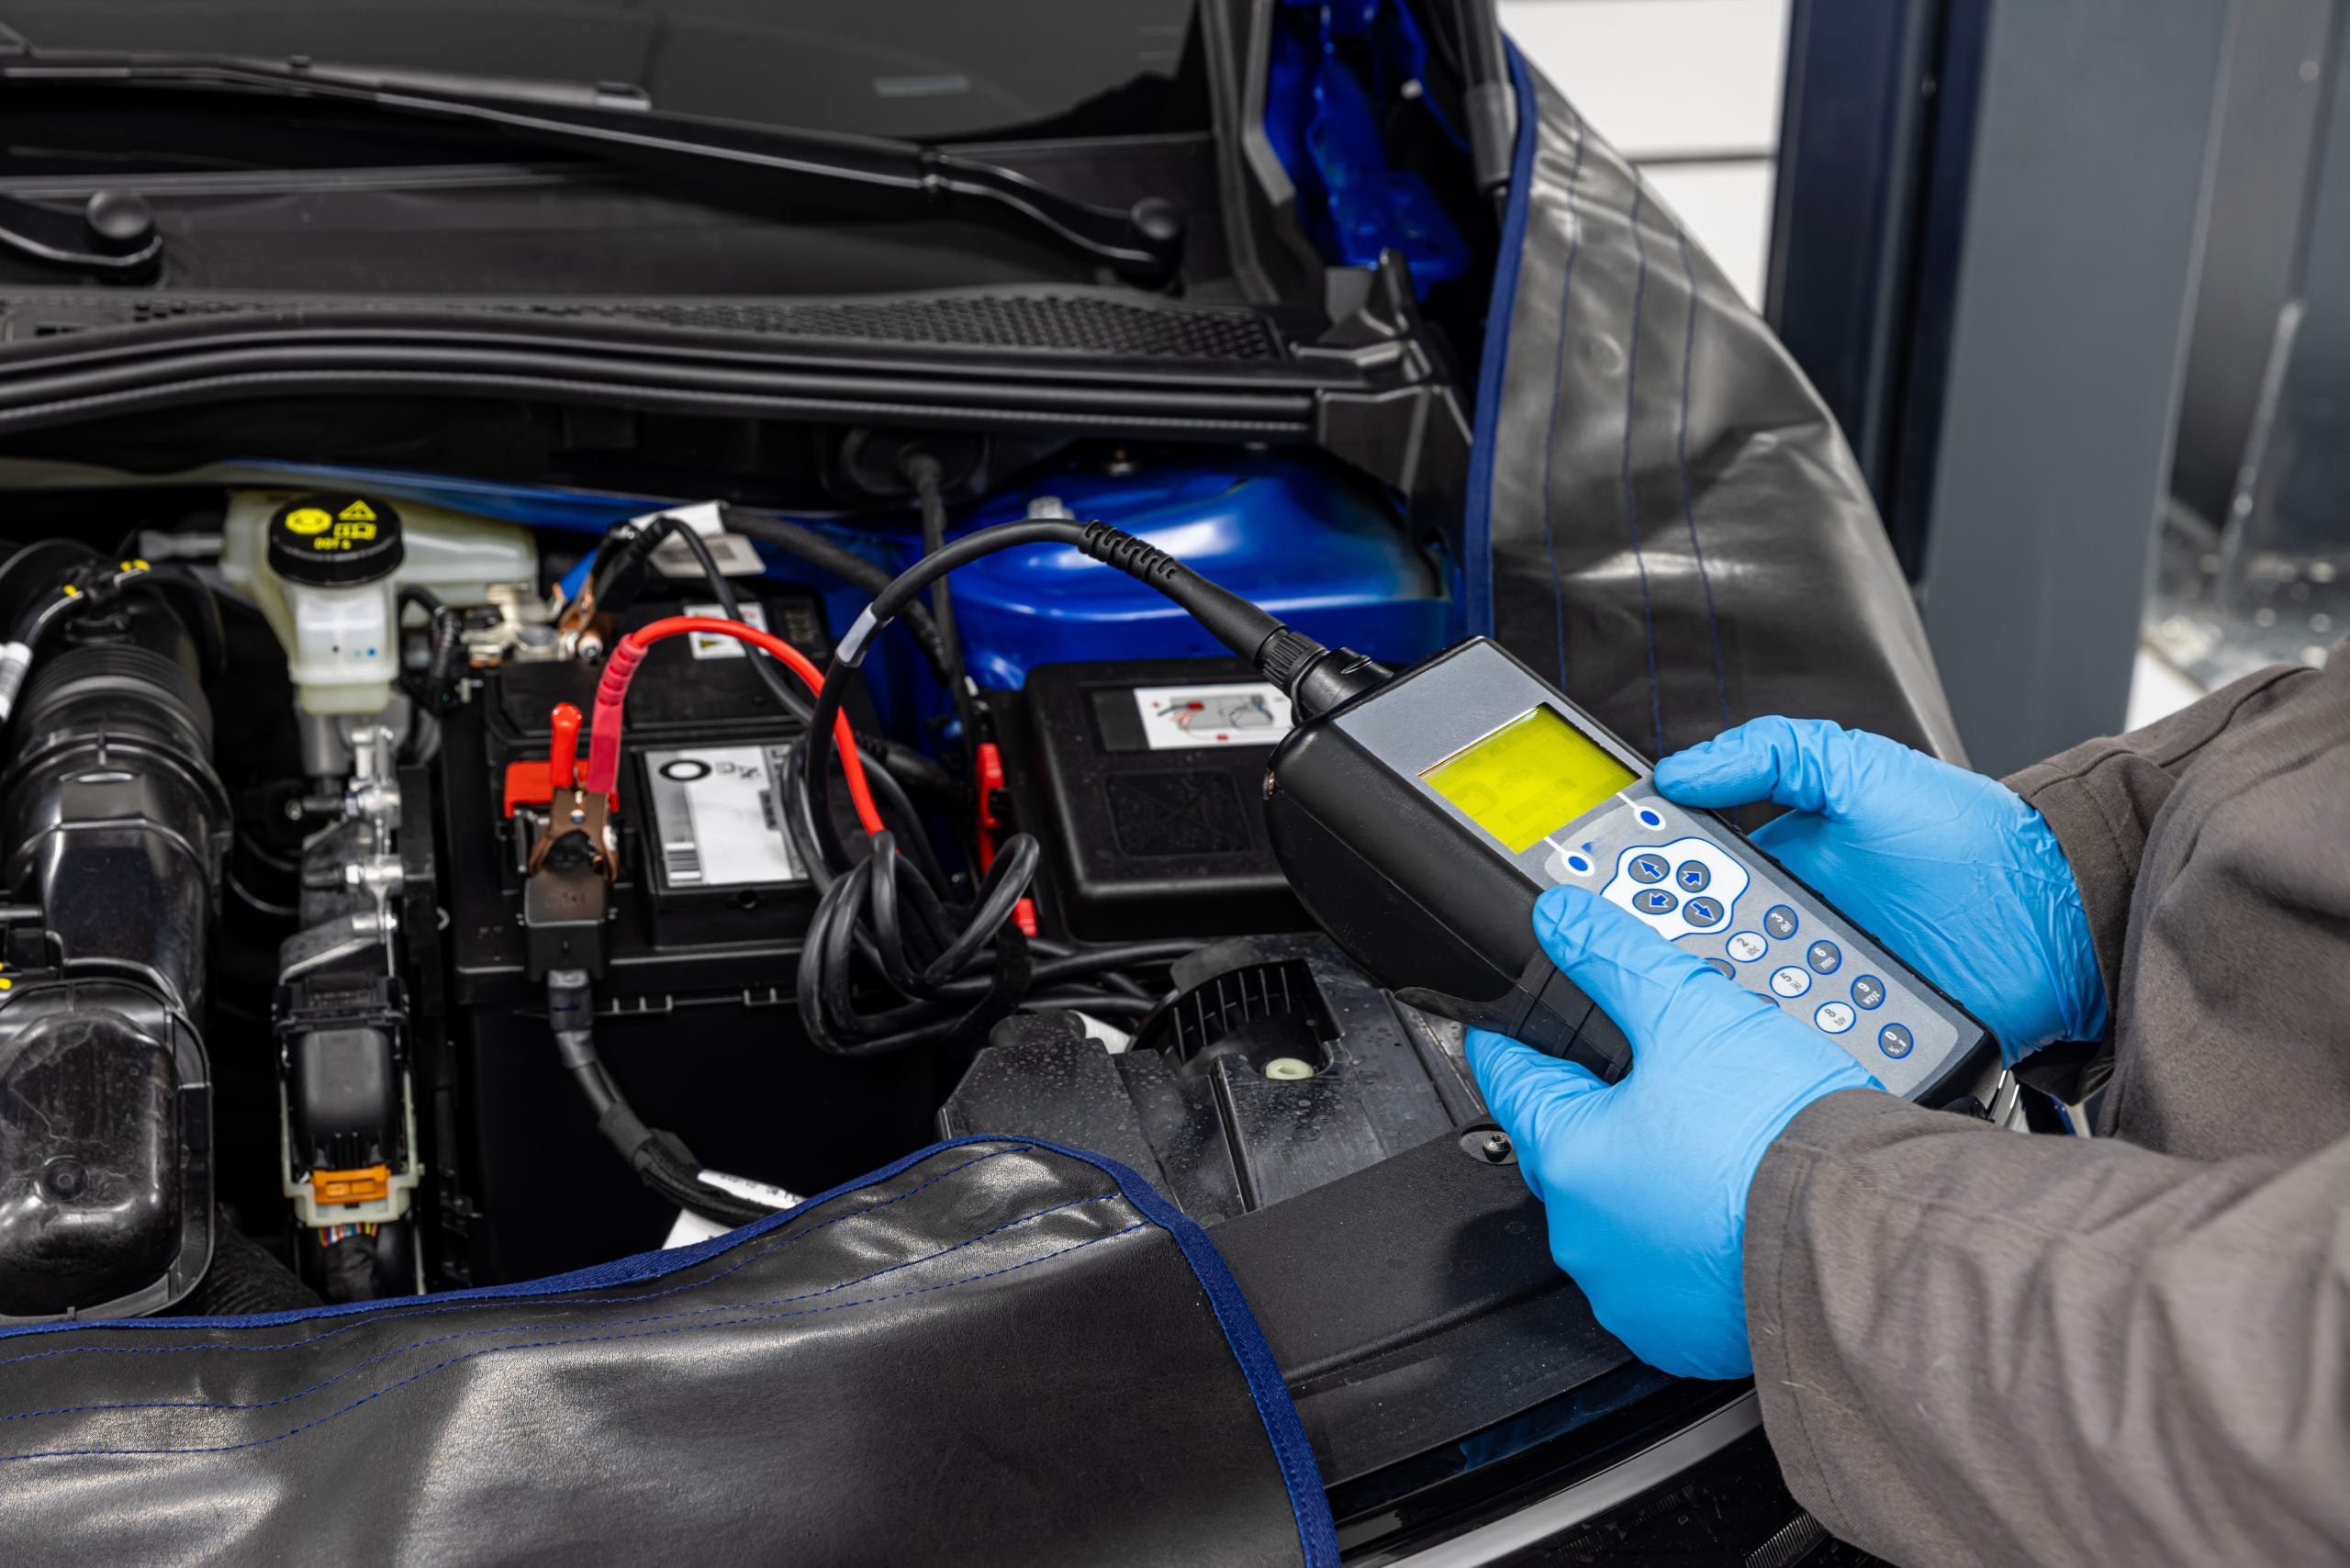
Learn the signs of battery failure and how to extend your battery's lifespan with expert tips from Dennis Sneed Ford Schedule Battery Test Contact Service more Ever been stuck because your car wouldn't start when you needed it most? You're not alone. Batteries are a big reason for breakdowns on the road, but most people don't think about them until it's too late. At Dennis Sneed Ford in Gower, Missouri, we think knowing is key. Knowing how long your battery will last can save you from unexpected problems. It keeps you safe and moving on the road. Average Battery Lifespan Most car batteries last three to five years under normal driving conditions. However, factors like driving habits, maintenance, and Missouri's extreme weather can significantly affect your battery's longevity. We've made this guide to help you spot problems early and understand what affects your battery. Our team is here to keep you informed and your car running smoothly, no matter what Missouri's roads bring. Understanding Average Car Battery Lifespan At Dennis Sneed Ford in Gower, Missouri, we help hundreds of customers each year understand their battery's expected lifespan. Knowing what to expect from your battery helps you plan ahead and avoid inconvenient breakdowns. The average car battery lifespan varies based on several important factors we'll explore in this section. We believe informed drivers make better decisions about their vehicle maintenance. That's why our service team takes time to explain battery performance and answer your questions. Let's dive into what you can realistically expect from your car's battery. Typical Battery Lifespan in Years The average car battery lifespan typically ranges from three to five years under normal driving conditions. However, we've seen batteries at our service center last anywhere from just one year to as long as six years. The variation depends on climate, driving habits, and how well the battery is maintained. Most quality batteries will perform reliably for at least three years. After this milestone, we strongly recommend scheduling regular battery testing at Dennis Sneed Ford. Our advanced diagnostic equipment can detect declining performance before you experience starting problems. Minimum Lifespan 1-2 years in extreme conditions or with poor maintenance Average Lifespan 3-5 years under normal driving conditions with regular care Maximum Lifespan 5-6 years with optimal maintenance and moderate climate Some batteries exceed expectations and continue working effectively for five or even six years. These longer-lasting batteries usually belong to vehicles that receive consistent maintenance and operate in moderate climates. We're always happy to test your battery free of charge to give you peace of mind. Understanding Your Battery Warranty Period Most quality car batteries come with warranties that provide valuable protection for your investment. The typical car battery warranty period includes a free replacement window of about three years. Understanding these warranty terms helps you maximize your coverage. Warranty coverage generally falls into two categories: free replacement and prorated replacement. During the free replacement period, if your battery fails testing, the manufacturer provides a brand-new battery at no cost. After this period ends, prorated coverage means you'll pay a percentage based on how long you've owned the battery. We encourage all our customers to keep their warranty documentation in a safe place. When you bring your vehicle to Dennis Sneed Ford for battery service, having this paperwork allows our team to process warranty claims quickly and efficiently. This can save you significant money on a replacement battery. Our expert technicians at Dennis Sneed Ford provide comprehensive battery testing and service Warning Signs Your Battery Is Failing Recognizing the early signs of a failing car battery helps you address problems before they leave you stranded. We always tell our customers not to wait until their car won't start to think about battery replacement. Paying attention to these warning signs can prevent frustrating breakdowns. Your vehicle communicates battery problems through various symptoms. Learning to identify these signals means you can schedule service at your convenience rather than dealing with an emergency. Let's look at the most common indicators that your battery needs attention. Slow Engine Crank A healthy battery starts your engine quickly and smoothly with a strong, confident turn. When your battery begins failing, you'll notice the engine cranks more slowly than usual. The starter may sound labored, or you might hear clicking, grinding, or buzzing noises. This sluggish cranking happens because the weakened battery can't deliver enough power to turn the engine over efficiently. Cold mornings often make this problem more noticeable. If you experience slow cranking, bring your vehicle to our Gower service center right away for testing. Dimming Headlights and Electrical Issues Your battery powers all electrical components in your vehicle. When it weakens, you'll notice dimming headlights, especially while idling at stop lights. The lights may brighten when you press the accelerator, indicating the alternator is compensating for a weak battery. Other electrical problems often accompany battery failure. You might experience flickering interior lights, slow-moving power windows, or erratic behavior from your radio and air conditioning system. These issues stem from inconsistent power delivery from a dying battery. Slow Engine Crank Engine turns over slowly with clicking, grinding, or buzzing sounds Dimming Lights Headlights dim at idle and brighten when accelerating Dashboard Warning Light Battery symbol illuminates indicating charging system issues Electrical Malfunctions Flickering interior lights, slow windows, erratic radio behavior Dashboard Warning Light Modern vehicles include a battery warning light on the dashboard, typically shaped like a battery symbol. When this light illuminates while driving, it indicates your charging system isn't working properly. This could mean battery failure, alternator problems, or loose connections. Never ignore a battery warning light. While it might seem minor, this indicator warns you of potentially serious electrical issues. The light may come on intermittently at first, then stay illuminated as the problem worsens. If you see this warning light, schedule an appointment with our service team immediately. Additional Warning Signs Additional warning signs include visible corrosion around battery terminals (white or bluish residue), cracks or bulges on the battery casing, and a pungent rotten-egg smell indicating a sulfuric acid leak. Any of these symptoms requires immediate professional attention at Dennis Sneed Ford. Key Factors That Impact Your Battery's Longevity Many things affect how long your car battery lasts. Some things you can't control, but knowing what impacts battery life helps you make better choices. We'll look at the main factors that affect battery life, especially for our Gower, Missouri customers. Cold Missouri Winters and Battery Performance Cold weather is a big problem for batteries in northwest Missouri. When it's below freezing, your battery loses up to 35% of its power. This makes starting your car harder during those frigid winter mornings. Cold weather also makes your engine oil thicker, requiring more effort from the starter to turn the engine. At the same time, the battery's chemical reactions slow down. This is why cars often struggle to start in the cold. Many batteries that seem fine in fall reveal their weaknesses when winter arrives. Hot Summer Temperatures Hot weather actually causes more damage to batteries than cold. Heat speeds up the chemical reactions inside your battery, leading to faster wear. High temperatures also cause the electrolyte fluid to evaporate faster, potentially exposing the internal plates. Missouri summers are hot, speeding up corrosion inside your battery. This damage adds up over time, shortening your battery's life. Many batteries that fail in winter actually got damaged in the summer—the heat weakened the battery, and the cold revealed the problem. Weather Condition Effect on Battery Power Loss Recommendation Extreme Cold (Below Freezing) Slowed chemical reactions, thicker oil Up to 35% Test battery before winter Extreme Heat (90°F+) Accelerated corrosion, fluid evaporation Permanent damage Park in shade, check fluid levels Moderate Climate (50-80°F) Optimal performance Minimal Regular maintenance Your Driving Habits Matter How you drive and use your car affects your battery's life. Your alternator recharges the battery when the engine is running. But it needs enough time to fully recharge after starting. Short trips don't give your alternator enough time to recharge the battery fully. This leads to sulfation buildup on the battery plates, reducing capacity over time. The battery works harder with each start but never gets fully recharged. Car batteries also face challenges when not used for a long time. Even when parked, your car draws power to keep systems running. If your car sits for weeks without running, the battery drains until it can't start the engine. We recommend taking a 30-40 minute drive weekly if your car doesn't get regular use. Regular battery maintenance can extend your battery's life and prevent unexpected breakdowns Proper Maintenance and Care Tips Simple preventive maintenance can extend your car battery's life. Regular care can add years to your battery's service life and prevent breakdowns. These tips don't need special tools or expertise—just a little time and attention. Terminal corrosion is a common problem we see at Dennis Sneed Ford. The white, crusty buildup around the terminals reduces electrical flow. You can clean this corrosion yourself using a baking soda and water solution, along with an old toothbrush or wire brush. Keep your battery connections tight and secure. Loose connections create resistance and prevent proper charging. Avoid using accessories like the radio, air conditioning, or phone chargers when your engine isn't running, as this puts direct strain on the battery without the alternator's support. Maintenance Task Frequency Why It Matters DIY or Professional Clean battery terminals Every 3-6 months Removes corrosion that blocks electrical flow DIY with baking soda solution Check cable connections Every 3-6 months Ensures tight connections for proper charging DIY with basic wrench Battery load test Every 6-12 months Identifies weakness before complete failure Professional at Dennis Sneed Ford Inspect for damage or leaks Every 3 months Catches physical problems early DIY visual inspection If you store a vehicle for a long time, consider using a trickle charger. These devices provide a slow, steady charge that prevents the battery from draining completely. We also recommend parking in a garage when possible, as this protects your battery from extreme temperatures. Schedule regular battery inspections at Dennis Sneed Ford at least twice yearly. Our technicians can perform load tests that show how much capacity your battery retains and predict when replacement might be needed. This proactive approach helps you avoid unexpected failures and plan for replacement on your schedule. Trust Our Team at Dennis Sneed Ford for Expert Battery Service Our team at Dennis Sneed Ford in Gower, Missouri is ready to help. We offer free battery testing to check your car's electrical health. This service gives you peace of mind and helps you avoid unexpected breakdowns. We can accurately diagnose and replace your battery. Our service center has quality batteries at competitive prices. Every installation comes with a warranty to protect your investment. Wondering when to replace your car battery? We suggest checking it after three years. You can do this during your oil change. It saves time and prevents emergencies. Our friendly team is ready to help. We'll tell you if your battery needs a replacement or just maintenance. Schedule an appointment online, call us, or visit our Gower service center today. Regular battery care keeps you safe on Missouri's roads. Let us help you stay reliable with proactive testing and expert service. Schedule Service Contact Us Frequently Asked Questions How long does a car battery typically last? Batteries usually last 3-5 years under normal driving conditions. However, at Dennis Sneed Ford we've seen batteries last anywhere from 1-6 years depending on climate, maintenance, and driving habits. After 3 years, we recommend regular testing to check if your battery is still performing well. What are the signs that my car battery is failing? Look out for slow engine crank, dim headlights, flickering interior lights, and erratic power accessory behavior. A dashboard battery warning light is also a clear indicator. If you notice any of these signs, visit Dennis Sneed Ford for a free battery test. When should I replace my car battery? Replace your battery if it's over 3-5 years old, shows signs of failure, or fails a load test. Our Gower, Missouri service team can tell you if your battery needs replacement or just maintenance during a quick inspection. How does cold weather affect my car battery performance? Cold weather causes batteries to lose up to 35% of their power and makes engine oil thicker, requiring more effort to start. This combination is why we see more battery failures in winter. Regular testing before the cold season helps prevent being stranded. Does hot weather damage car batteries? Yes, heat actually damages batteries more than cold. High temperatures speed up chemical breakdown, cause fluid evaporation, and accelerate internal corrosion. Summer maintenance is just as important as winter care for extending your battery's life. What car battery maintenance tips can extend battery life? Clean terminals regularly, keep connections tight, avoid using accessories when the engine is off, and take longer drives to allow full recharging. Schedule regular inspections at Dennis Sneed Ford—a little preventive care goes a long way in extending battery life. How do driving habits affect battery life? Short trips don't give your alternator enough time to fully recharge the battery, leading to sulfation buildup and reduced capacity. We recommend longer drives of 30-40 minutes weekly to keep your battery healthy, especially if you don't drive regularly. What services does Dennis Sneed Ford offer for car batteries? We offer free battery testing, professional diagnosis, quality battery installation with warranty protection, and regular maintenance services. Visit our Gower service center for comprehensive battery care and expert advice on keeping your vehicle running reliably.
How to Change Your Oil: A Step-by-Step Guide

Learn to save money and care for your car with this complete DIY oil change guide Schedule Service View Service Specials more Ever thought about saving money and caring for your car at the same time? Learning to change your oil yourself is a smart choice for car owners. We're excited to share a complete guide on how to do a DIY oil change that's easy to follow, whether you're new to it or need a refresher. At Dennis Sneed Ford in Gower, Missouri, we think knowing how to care for your car is empowering. Our service center can change your oil for you, but knowing how helps you bond with your vehicle. This guide will show you how to get started, from gathering tools to doing safety checks. Complete DIY Oil Change Guide You'll learn about different oil types, how to safely drain the oil, and how to replace filters. By the end, you'll feel confident in keeping your engine in top shape between visits to our dealership. Your vehicle's owner's manual is key to a successful oil change. It tells you about oil capacity, viscosity, filter numbers, and safe jacking points. Keep it close by while you work through each step of the process. What You'll Need for Your DIY Oil Change Having everything ready can make your oil change smooth. It's all about being prepared. We'll show you what tools, oil, and filters you need before starting. Gathering your supplies ahead of time ensures a seamless experience. Gathering Your Tools and Supplies You'll need some important items for a safe oil change. A floor jack and jack stands are essential for lifting your car. Never use a jack alone, as it's very dangerous. A big drain pan is needed to catch the old oil—most cars hold five to seven quarts, so pick a pan that can hold at least that. Floor Jack & Jack Stands Essential for safely lifting and supporting your vehicle while you work underneath Drain Pan & Socket Wrench Catch old oil and remove the drain plug with the right size socket (13mm, 14mm, or 15mm) Filter Wrench & Funnel Remove the old filter easily and add new oil without spills Don't forget rags or paper towels for cleaning up, and wear gloves and safety glasses for protection. Having all these tools ready before you start makes the process much smoother and safer. Understanding Motor Oil Options Choosing the right motor oil depends on your car and how you drive. The manual will tell you the recommended viscosity, like 5W-30 or 10W-40. These numbers affect how the oil works at different temperatures, which is important for your engine and fuel efficiency. You can pick from conventional, synthetic blend, or full synthetic oil. Each has its own benefits and cost considerations. Conventional oil is good for older cars and regular driving. Synthetic blends offer better protection at a moderate price. Full synthetic oil is best for extreme temperatures and tough driving conditions. Oil Type Best For Temperature Performance Change Interval Conventional Older vehicles, light-duty use, budget-conscious drivers Adequate in normal conditions 3,000-5,000 miles Synthetic Blend Newer vehicles, moderate driving demands, balanced protection Better high-temp resistance 5,000-7,500 miles Full Synthetic High-performance engines, extreme conditions, maximum protection Excellent in heat and cold 7,500-10,000+ miles If you're not sure what oil is best for your car, our team at Dennis Sneed Ford in Gower, Missouri can help. We know what different vehicles need and can recommend the perfect match for your driving conditions. Finding the Right Filter Every oil change needs the right filter for your car. Filters come in different sizes, thread patterns, and filtration levels. The wrong filter can cause problems like poor oil flow or leaks. Your manual will tell you the correct filter part number, or you can check with our parts department for an OEM-quality filter. Before putting in the new filter, apply a bit of oil to the rubber O-ring. This helps the filter seal properly and makes it easier to remove next time. Choosing the right filter is as important as picking the right oil for your engine's health. Having the right tools ready makes your DIY oil change smooth and efficient How to Change Your Oil: Step-by-Step Instructions Are you ready to do your first oil change? We'll walk you through each step to make sure you do it right. Changing your oil might seem tough at first, but many people do it at home successfully. Always put safety first, take your time, and double-check your work. If you're unsure at any point, Dennis Sneed Ford's experts are here to help. Prepare Your Vehicle and Workspace Before you start, make sure your workspace is safe. Park on a level surface and engage the parking brake. A level surface helps with oil level checks and prevents the car from moving. If your engine is cold, warm it up for 2-3 minutes. Warm oil drains better than cold oil, but don't let it get too hot to avoid burns. Check your owner's manual for the right jack points. Use a floor jack to lift the car, then place jack stands under the frame. Make sure the car is stable before you start. Never get under a car supported only by a jack—jacks can fail, and it's dangerous. Jack stands add the extra safety you need. Open the hood and find the oil fill cap. Remove it to let air in, which helps the old oil drain better. Put your tools within reach under the car before you begin. Always secure your vehicle on jack stands before working underneath Drain the Old Engine Oil Slide under the car with your drain pan and socket wrench. Find the oil drain plug at the bottom of the oil pan—it's usually a bolt at the lowest point. You'll need a 13mm, 14mm, or 15mm socket, depending on your car. Place your drain pan under the plug, positioned a bit forward since oil flows at an angle at first. Use your socket wrench to loosen the plug by turning counterclockwise. Then remove the wrench and finish unscrewing by hand. Keep pressure on the plug as you remove the last threads and pull it out quickly to avoid dropping it into the oil. Let the oil drain completely—this takes 5-10 minutes, depending on your engine and oil temperature. You'll know it's done when the flow slows down to drips. Check the drain plug's threads and washer for damage and replace if needed. Some cars use a crush washer that needs replacement with each oil change. Position your drain pan correctly and allow the old oil to drain completely Replace the Oil Filter While the oil drains, find your oil filter. It might be above or below your engine. Place your drain pan under the filter since it holds about one cup of oil. Try to loosen the oil filter by hand first. If it's too tight, use an oil filter wrench. Once loose, remove it by hand, tipping the open end up to prevent spills. Look at the engine's filter mounting plate carefully. The rubber O-ring from the old filter must come off with it. If you install a new filter without removing the old O-ring, you'll have a leak. Clean the mounting surface with a clean rag. Take your new oil filter and find its rubber O-ring. Dip your finger in fresh motor oil and run it around the O-ring. This helps it seal better and makes removal easier next time. Thread the new filter onto the mounting plate by hand, turning clockwise. Never use a filter wrench to install a filter. Tighten it until the O-ring contacts the engine, then follow the filter's instructions—most need three-quarters to one full turn after contact. Apply fresh oil to the new filter's O-ring before installing by hand Add Fresh Motor Oil With the new filter on, go back to the drain plug. Clean the plug threads and oil pan threads with a shop towel. Check the drain plug for thread damage. Hand-thread the plug into the oil pan, turning clockwise. Thread it in as far as you can by hand to avoid cross-threading. Use your socket wrench to tighten the drain plug firmly but don't overtighten—you can strip the threads or crack the oil pan. If your owner's manual gives a torque value, use a torque wrench. Most drain plugs need 25-35 foot-pounds of torque. Move to the top of your engine and find the oil fill opening. Put your funnel in the opening. Check your owner's manual for how much oil you need—usually 4-6 quarts, depending on your engine. Pour in about three-quarters of the oil slowly, then add the rest in half-quart increments. It's better to add small amounts and check often than to overfill. Once you've added the right amount, put the oil fill cap back on and make sure it's tight. Use a funnel to add fresh oil slowly, checking the level frequently Check Oil Level and Inspect for Leaks Start your engine and let it run at idle for 30-60 seconds. Watch your dashboard—the oil pressure warning light should turn off soon. If it doesn't, turn off the engine and check for problems. While the engine runs, check the drain plug and oil filter for leaks. Look for drips or wet spots. A little oil on the outside is okay, but active dripping means a problem. After confirming no leaks, turn off the engine and wait 30-60 seconds for the oil to drain back into the oil pan. Remove the dipstick completely and wipe it clean. Put the dipstick back in and pull it out again right away. Check where the oil level falls on the dipstick markings—it should be between the "Add" and "Full" marks, ideally near the full line. If the level is low, add oil in quarter-quart increments, waiting a moment between additions and checking again. Never overfill your engine—too much oil can damage seals and increase crankcase pressure. Once you've confirmed the right oil level and no leaks, remove your jack stands and carefully lower your vehicle. Verify the oil level is between the "Add" and "Full" marks on your dipstick Quick Reference: Oil Change Steps at a Glance Use this handy reference table to guide you through each phase of your oil change. Each step includes key actions, safety precautions, and estimated time to help you plan your DIY maintenance session. Oil Change Step Key Actions Safety Caution Estimated Time Prepare Vehicle & Workspace Park on level surface, raise vehicle, secure with jack stands, remove oil fill cap Never work under vehicle supported only by jack; always use jack stands 10-15 minutes Drain Old Engine Oil Remove drain plug, allow complete drainage, inspect plug and washer Oil may be hot; keep firm grip on drain plug to prevent dropping into oil 10-12 minutes Replace Oil Filter Remove old filter, clean mounting surface, lubricate new O-ring, install hand-tight Verify old O-ring removed from engine; don't overtighten new filter 5-8 minutes Add Fresh Motor Oil Reinstall drain plug to spec, pour correct oil amount through funnel, secure fill cap Don't overtighten drain plug; avoid overfilling engine with oil 8-10 minutes Check Level & Inspect for Leaks Run engine 30-60 seconds, check for leaks, verify proper oil level on dipstick Oil pressure light should turn off within seconds; shut down if it remains on 5-8 minutes Congratulations on completing your DIY oil change! Write down the date, mileage, and type of oil used in your maintenance log. This helps you remember when your next oil change is due. Oil Change Frequency and Maintenance Tips Maximizing engine life depends on three key factors: knowing when to change your oil, choosing the right oil type, and disposing of used oil properly. These tips help you care for your engine effectively, ensuring your vehicle runs well and saving you money over time. When Should You Change Your Oil? The old "every 3,000 miles" rule is outdated for most cars today. Modern engines and better oils mean many vehicles can go much farther without needing an oil change. Check your owner's manual for the recommended interval, which is usually between 5,000 to 10,000 miles. However, these guidelines assume normal driving. If you drive under severe conditions, you'll need to change your oil more often. Severe service includes short trips, stop-and-go traffic, extreme temperatures, and dusty conditions. If you drive in these conditions, follow the more frequent schedule in your manual. At Dennis Sneed Ford in Gower, Missouri, our advisors consider your driving habits and vehicle needs. We help you find the best oil change interval for your engine's protection and your schedule. Which Oil Type Is Best for Your Vehicle? The debate between synthetic and conventional oil focuses on performance, protection, and cost. Conventional oil is refined from crude petroleum and works well for many vehicles. It's less expensive and suitable for regular driving. Older vehicles and those with simpler engines often do well with conventional oil. Synthetic oil is made to perform better in tough conditions. It flows better in cold weather, resists breakdown in heat, and lasts longer. Synthetic oil also offers better engine protection and can improve fuel efficiency slightly. Synthetic blend oils mix conventional and synthetic base stocks, offering some synthetic benefits at a lower cost. Oil Type Best For Change Interval Cost Level Conventional Older vehicles, simple engines, normal driving conditions 3,000-5,000 miles Lowest Synthetic Blend Moderate performance needs, budget-conscious drivers 5,000-7,500 miles Moderate Full Synthetic Newer vehicles, high-performance engines, extreme conditions, towing 7,500-15,000 miles Highest We usually recommend synthetic oil for newer vehicles, turbocharged engines, and extreme conditions. While it costs more upfront, its longer change intervals and superior protection can save you money in the long run. How to Dispose of Used Oil Properly Used motor oil is hazardous waste and must be disposed of correctly to protect the environment. Improper disposal can contaminate large amounts of groundwater. Never pour used oil down drains, onto the ground, or in trash containers. Seal & Store Transfer drained oil into a sealed container with a tight-fitting lid to prevent spills Find Drop-Off Locations Many auto parts stores and recycling centers accept used oil for free Dispose of Filters Drain filters for 12+ hours before taking them to facilities that accept used oil Our service center at Dennis Sneed Ford follows all environmental regulations for oil disposal and recycling. We're dedicated to protecting our community's environment and help local DIY mechanics find responsible recycling options in Gower, Missouri. Keep Your Vehicle Running Smoothly with Dennis Sneed Ford This guide should make you feel ready to replace your engine oil. At Dennis Sneed Ford in Gower, Missouri, we want to help you keep your car in top shape. Not everyone can do their own car maintenance, and that's where our team comes in. Our service center has top-notch equipment and certified technicians for quick, safe oil changes. When you come to us, we use the best oils and filters. We also do a free multi-point inspection, checking fluids, belts, brakes, and tires to find issues early. Our service department makes scheduling easy and prices clear. We only suggest services you really need. Whether you like to fix things yourself or need our help, we're here for you. Visit Dennis Sneed Ford in Gower, Missouri, or call us to book your next service. We're dedicated to meeting your car's needs. Your vehicle deserves the best care, whether at home or at our service center. Schedule Service View Service Specials Frequently Asked Questions How often should I change my oil? The frequency of oil changes depends on your vehicle, oil type, and driving habits. Modern vehicles and synthetic oils may need changes every 5,000 to 10,000 miles. Always check your owner's manual for the recommended interval. If you drive under harsh conditions, you might need to change your oil more often. At Dennis Sneed Ford in Gower, Missouri, we can help you find the best schedule for your vehicle and driving habits. What's the difference between synthetic and conventional oil? Conventional oil is refined from crude oil and works well for many standard engines. Synthetic oil is engineered at the molecular level and provides superior engine protection, especially in extreme temperatures, while lasting longer between changes. Synthetic blend oils offer a middle ground with some synthetic benefits at a more affordable price. We recommend synthetic oil for newer vehicles, high-performance engines, and those used for towing. Can I use any oil filter for my vehicle? No, you need the specific oil filter designed for your vehicle's make, model, and engine type. Using the correct filter ensures proper oil flow and filtration efficiency to protect your engine. Your owner's manual will have the part number, or you can check with our parts department at Dennis Sneed Ford to ensure you're getting an OEM-quality filter that meets manufacturer specifications. Is it safe to change my own oil at home? Yes, changing your own oil can be safe if you follow proper procedures and take necessary precautions. Always use a floor jack and jack stands rated for your vehicle's weight—never rely on a jack alone to support your vehicle while you're underneath. Work on a level surface, engage the parking brake, and wear safety glasses and gloves. If you're uncomfortable working under your vehicle, we're always here at Dennis Sneed Ford to perform the service safely and professionally. How much oil does my vehicle need? The amount of oil your vehicle needs varies by engine size and design, typically ranging from 4 to 6 quarts, though some larger engines may require more. Your owner's manual will specify the exact capacity for your vehicle. When adding oil, pour slowly and check the level frequently with your dipstick—it's better to add a little at a time than to overfill. What tools do I need for a DIY oil change? For a successful oil change, you'll need a floor jack and jack stands to safely elevate your vehicle, a drain pan large enough to catch 5-7 quarts of oil, a socket wrench set or the correct size wrench for your drain plug, oil filter pliers or a filter wrench, a funnel for adding new oil, and plenty of rags or paper towels for cleanup. We also recommend wearing gloves and safety glasses for protection. How do I dispose of used motor oil properly? Used motor oil should never be poured down drains, dumped on the ground, or thrown in the trash. Instead, pour your used oil into a sealable container, such as empty oil bottles. Many auto parts stores, quick-lube facilities, and recycling centers accept used oil free of charge. Used oil filters should also be properly disposed of at these same facilities. What viscosity oil should I use in my vehicle? Your vehicle's owner's manual will specify the recommended oil viscosity, such as 5W-30 or 10W-40. The viscosity rating indicates how the oil flows at different temperatures, which affects engine protection and fuel efficiency. Using the correct viscosity ensures your engine receives proper lubrication in all conditions. If you're unsure, our team at Dennis Sneed Ford can help you identify the perfect match. Why should I warm up my engine before changing the oil? Running your engine for a few minutes before draining the oil helps warm it slightly, making it flow more easily and drain more completely from the oil pan and engine components. Warm oil is thinner and removes more contaminants and sludge when drained. However, be careful not to let the oil get too hot, as this can cause burns. How tight should I tighten my oil drain plug? Your drain plug should be tightened to the torque specification listed in your owner's manual, typically between 20-30 foot-pounds for most vehicles. After hand-tightening the plug, use your socket wrench to tighten it firmly—but be careful not to overtighten, as this can strip the threads in your oil pan or damage the plug itself. What should I do if I see oil leaking after my oil change? If you notice oil leaking after completing your oil change, shut off the engine immediately and identify the source of the leak. Common leak points are the drain plug and oil filter. If the drain plug is leaking, it may need to be tightened slightly more. If the oil filter is leaking, check that the old filter's O-ring didn't stick to the engine mounting surface and that the new filter is properly tightened. If you cannot identify or fix the leak, bring your vehicle to Dennis Sneed Ford where our certified technicians can diagnose and repair the issue. Do I need to reset my oil life monitor after changing my oil? Yes, if your vehicle has an oil life monitoring system, you'll need to reset it after completing your oil change. The reset procedure varies by make and model, so consult your owner's manual for specific instructions. Resetting the system ensures it accurately tracks your next oil change interval. Our service team at Dennis Sneed Ford can show you the process for your specific vehicle. Should I change my oil filter every time I change my oil? Yes, we strongly recommend replacing your oil filter with every oil change. The oil filter traps contaminants, dirt, and metal particles that accumulate as your engine runs. Over time, these contaminants can clog the filter, reducing its effectiveness. A new filter ensures optimal filtration and protects your engine investment. What happens if I overfill my engine with oil? Overfilling your engine with oil can cause several problems. Excess oil can create foaming as the crankshaft whips through the higher oil level, reducing the oil's lubricating properties. This can lead to inadequate lubrication, increased engine temperatures, and potential damage to engine components. If you discover you've overfilled your engine, drain the excess oil until the level reads correctly on the dipstick. Can I mix different brands or types of motor oil? While you can technically mix different brands of the same oil type and viscosity in an emergency, we don't recommend it as a regular practice. Different brands may use different additive packages that could interact unpredictably. For optimal engine protection and performance, use a single type and brand of oil that meets your vehicle manufacturer's specifications.

Contact Us

Fill out this form below and we'll contact you shortly
*Required Fields